How to Enable Developer Mode on iOS 16 for App Testing
For developers and testers working with iOS 16 and above, enabling Developer Mode is a crucial step for running internal distribution builds and local development builds directly on an iPhone or iPad. This guide will walk you through the process of activating Developer Mode on your iOS device.
Prerequisites
Before proceeding, ensure that you have installed the development build on your iOS device. This setup is required only once per device.
Step-by-Step Guide to Enable Developer Mode
Step 1: Trigger the Developer Mode Alert
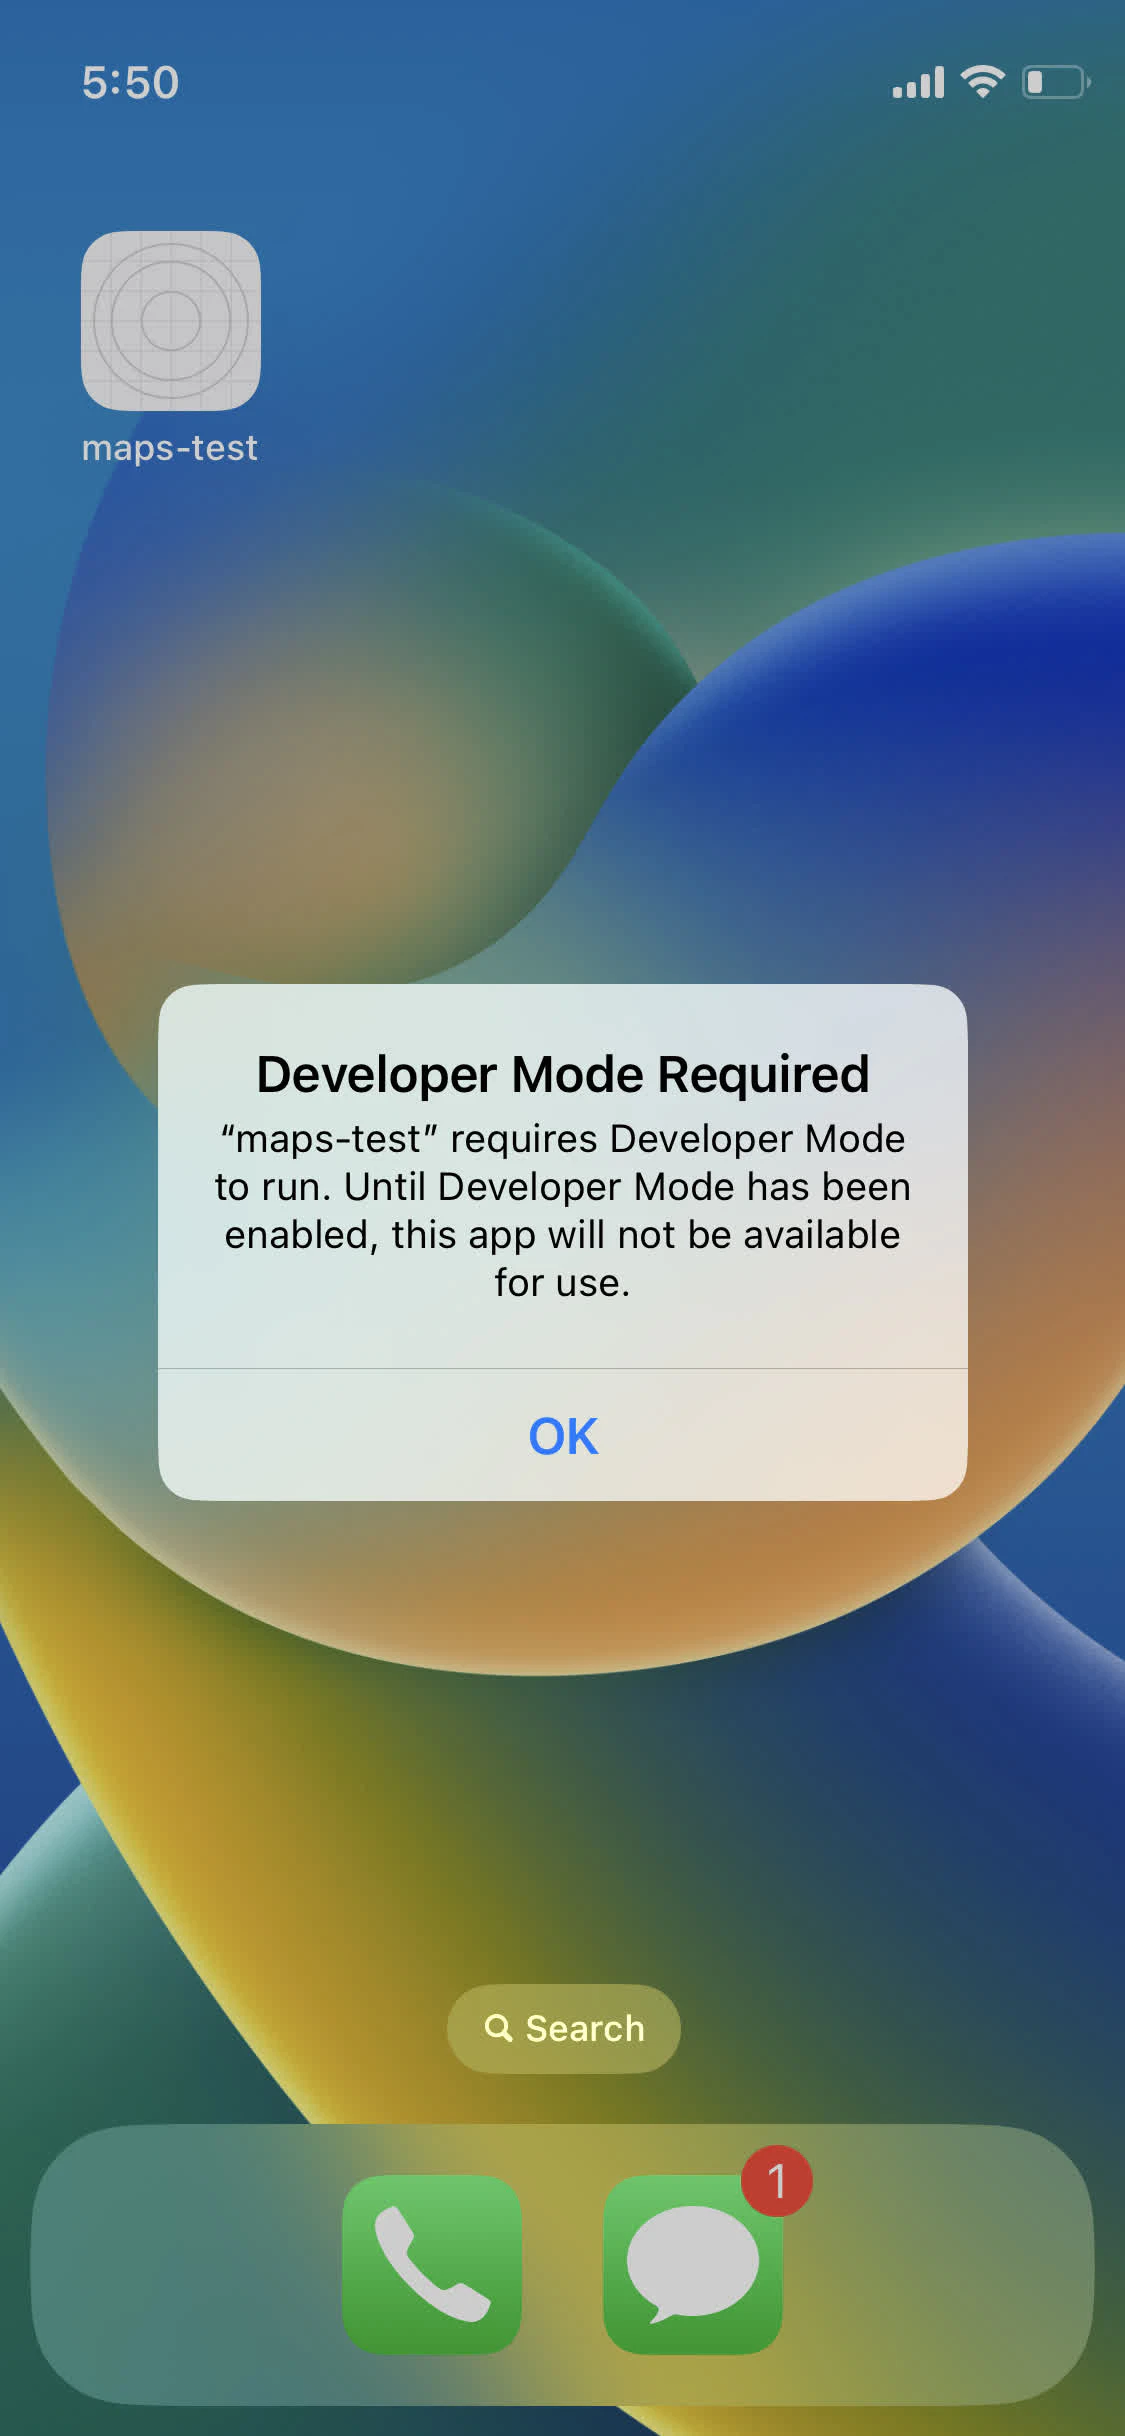
After installing the build on your device, tap the app icon. An alert will pop up, prompting you to enable Developer Mode. Click OK to proceed.
Step 2: Access Developer Mode Settings
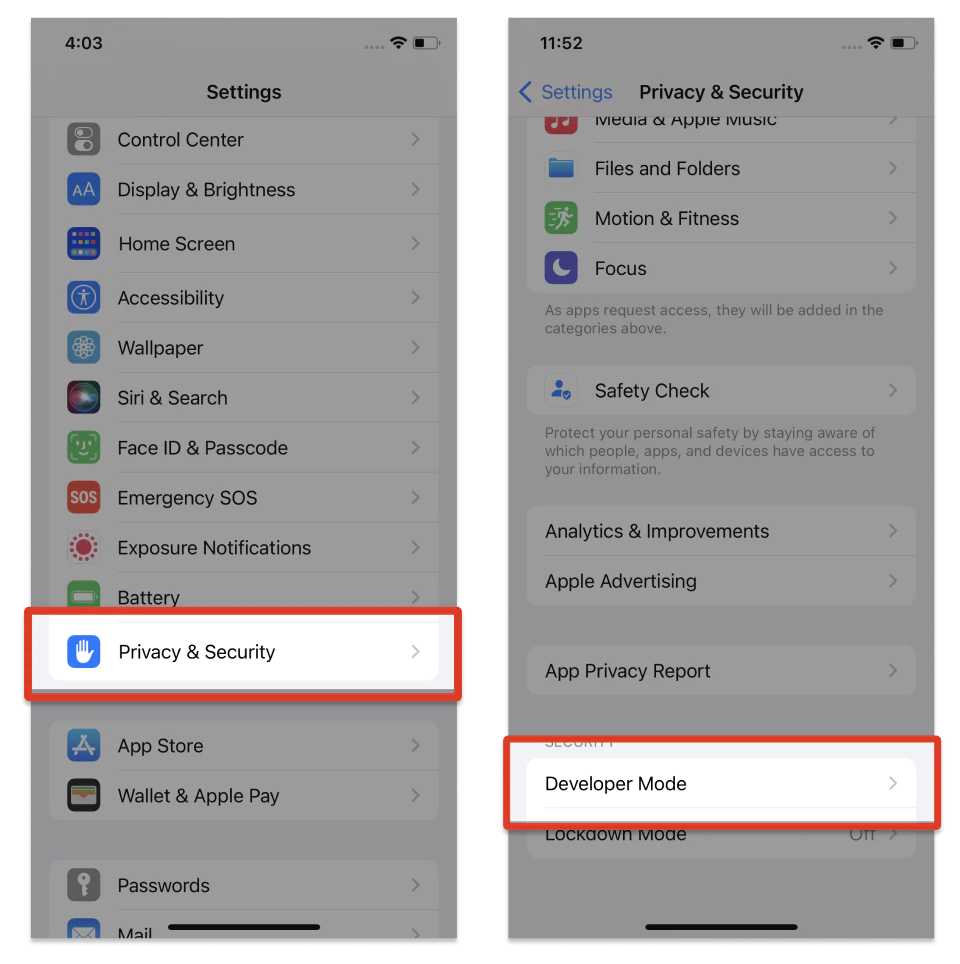
Open the Settings app on your iOS device. Navigate to Privacy & Security and then select Developer Mode.
Step 3: Enable Developer Mode and Restart
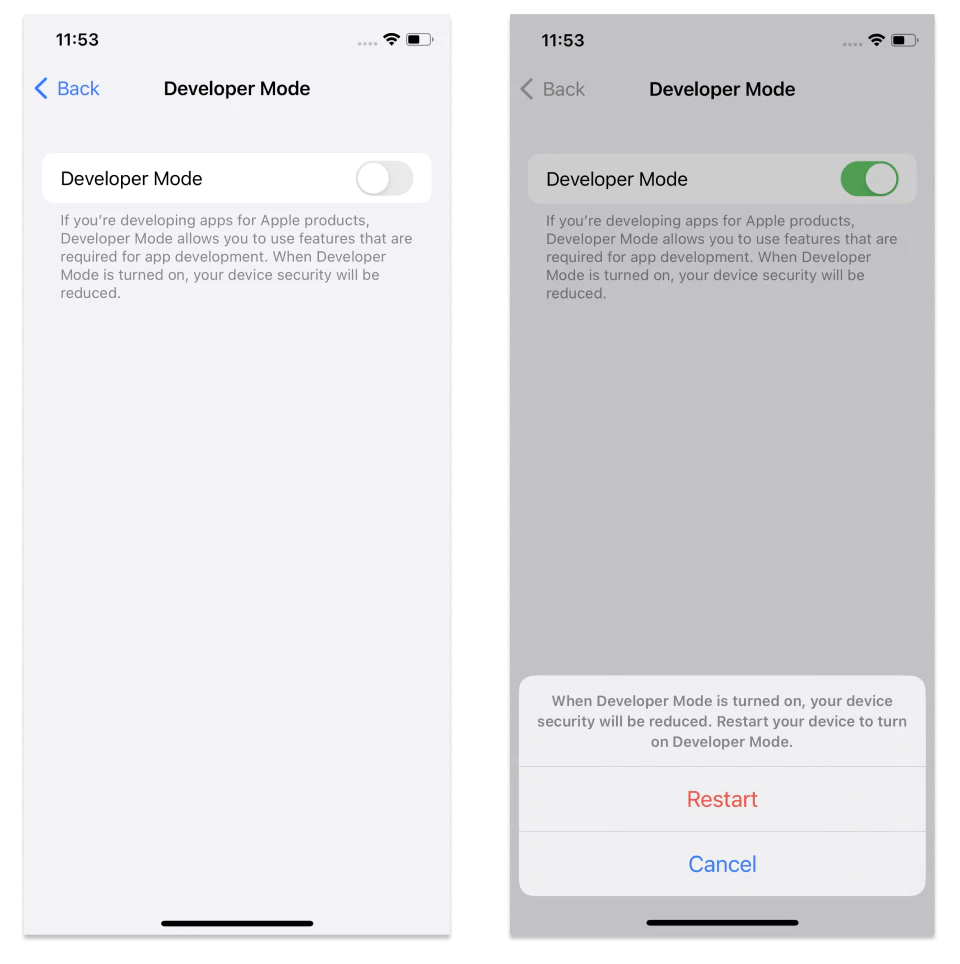
Switch on the Developer Mode toggle. iOS will prompt you to restart your device for the changes to take effect. Tap Restart to initiate the reboot.
Step 4: Finalize the Activation
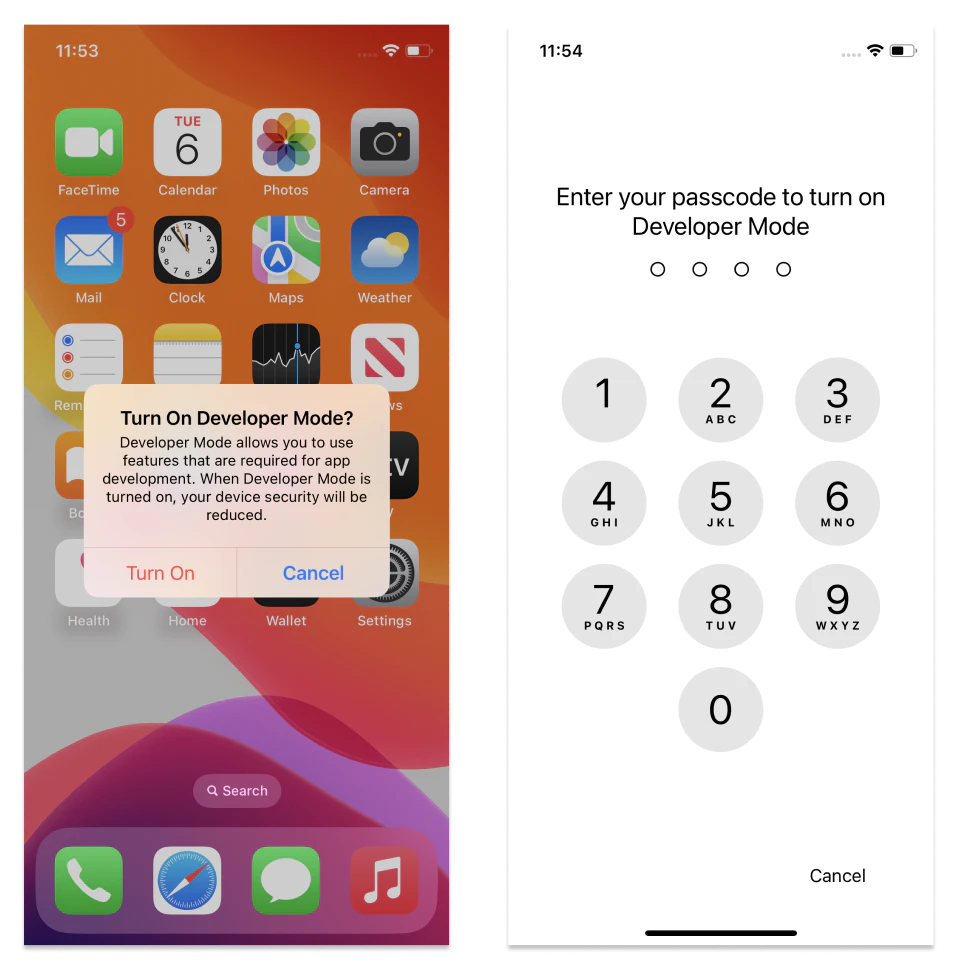
Once your device restarts and you unlock it, a system alert will appear. Click Turn On and enter your device’s passcode when prompted to complete the activation of Developer Mode.
With Developer Mode now active, you can fully engage with your internal distribution builds and local development builds.
Remember, you can disable Developer Mode at any time through the same settings. However, re-enabling it will require you to follow these steps again.
Alternative Method for Enabling Developer Mode
If you encounter issues with the above method and you have access to a Mac, you can enable Developer Mode by connecting your iOS device to your Mac and following the instructions provided in Apple’s official documentation.
By following these steps, you’ll be ready to test and develop apps effectively on your iOS device running iOS 16 or later.

